July 14, 2018 by Arik Lalo

As you probably know, the “Table” component allows you to use an out of the box filtering.
A while ago, I’ve been asked to execute a table filtering programmatically – that is, use a java code to automatically populate the filter.
In my current example I’m using a button to perform a filtering action. Of curse you can use the code in many other ways,
Well, here are the steps:
First, add a binding to the table with getter & setter:
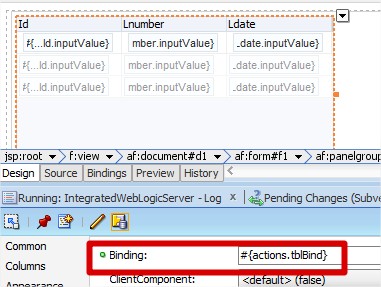
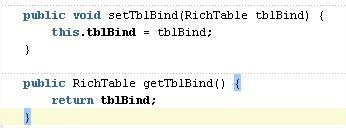
Continue Reading »
Posted in ADF, Uncategorized | Tagged adf, application, bean, java, JDeveloper, oracle | 1 Comment »
December 23, 2016 by Arik Lalo
You might face a problem in your ADF application, when based on a HumanTask component (BPM), using the out of the box Comments & Attachemnts.
Well…suddenly it’s not working anymore…you press the add attachmen/comment button, and nothing happen.
So, obviously you first need to verify that the user has the right permission for that action. Once it is clear, check that the following declaration exists in your .jspx page:

Bug or not…it can sometimes disappear and might driving you crazy.
Good Luck

Posted in ADF, BPM, Uncategorized | Leave a Comment »
December 22, 2016 by Arik Lalo
I’m getting many questions regarding to how can we control components base on other components.
One of the standards ways is to use the object’s properties and EL expression.
So, this is something very basic in ADF and I think it’s important to understand and know.
Many of the ADF faces component have 2 important properties: AutoSubmit and PartialTriggers.
Basically what they are saying:
- AutoSubmit: when it is set to true, you are partially submitting an action. For example, changing the value of an inputText.
When the value is being changed, there is no need to wait for a refresh or a global update.
That way you can control a specific objects in your page.
- PartialTriggers: in this property you are referring to the previous input text.
If you want the current object to fire an action, based on another object (like inputText changing value), you need to set the partialTriggers value to the id of that component.
Here is a simple example: You have 2 inputtext, A & B. B is disable, until a value will be enter in A. For that we will use only EL expression:


Good Luck
Posted in ADF, Uncategorized | Tagged adf | Leave a Comment »
December 21, 2016 by Arik Lalo
In this post I will explain, how in a simple way you can use managed bean to perform a binding operation.
In case of using ADF for managing Human Task flows (BPM process), you sometimes want to perform post/pre actions to the native operation.
For example: you want the user to press the approve action, and in the background you want to call a Web service for some validations.
Here is how you do it:
- Create a bean method by double click the action button, or manually create a class with the required method:
 to copy:
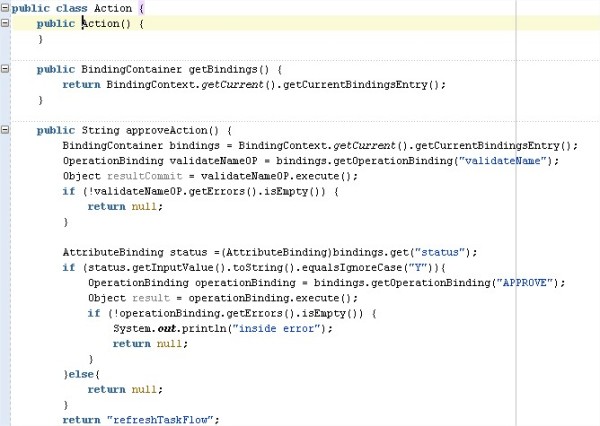
public String approveAction() {
BindingContainer bindings = BindingContext.getCurrent().getCurrentBindingsEntry();
OperationBinding validateNameOP = bindings.getOperationBinding("validateName");
Object resultCommit = validateNameOP.execute();
if (!validateNameOP.getErrors().isEmpty()) {
return null;
}

AttributeBinding status =(AttributeBinding)bindings.get("status");
if (status.getInputValue().toString().equalsIgnoreCase("Y")){
OperationBinding operationBinding = bindings.getOperationBinding("APPROVE");
Object result = operationBinding.execute();
if (!operationBinding.getErrors().isEmpty()) {
System.out.println("inside error");
return null;
}
}else{
return null;
}
return "refreshTaskFlow";
- Declare the bean in the action listener property of the command button:

That’s it.
Just be sure, that both APPROVE & validateName operations are declared in the binding. Or else you will get nullPointerException.
Good Luck
Posted in ADF, Uncategorized | Tagged adf, bean, bpm, human task, java | Leave a Comment »
January 23, 2016 by Arik Lalo
Let’s say you want to call a a taskFlow activity, for example, a “back” activity, but declarative within your java code:

Use the below code in a bean in order to call a task flow navigation within your ADF application:
import javax.faces.application.NavigationHandler;
import javax.faces.context.FacesContext;

....

NavigationHandler backHnd =
FacesContext.getCurrentInstance().getApplication().getNavigationHandler();
backHnd.handleNavigation(FacesContext.getCurrentInstance(), null,"back");
Good Luck!
Posted in ADF | Tagged adf, bean, oracle, task flow, taskflow | Leave a Comment »
January 23, 2016 by Arik Lalo
A very simple but frequently asked question is: how use more then 1 human task, of the same type, in one ADF application?
Go to your ViewController project and open the file hwtaskflow.xml
Copy the hwTaskFlow element, and its content, and change the values for: WorkflowName & TaskDefinitionNamespace elements (those are the name & targetNamespace from the Human Task).
      OriginHT
      http://xmlns.oracle.com/OriginHT
      OriginHT_TaskFlow
      WEB-INF/OriginHT_TF.xml


      NewHT
      http://xmlns.oracle.com/NewHT
      OriginHT_TaskFlow
      WEB-INF/OriginHT_TF.xml
Good Luck!
Posted in ADF, BPM | Tagged adf, human task, oracle, Oracle BPM Suite | Leave a Comment »
June 10, 2015 by Arik Lalo
In this post I will show how to create and deploy your composite with a simple BPEL process. The main goal is to describe the deployment process in the local SOA environment. The steps are very simple and almost the same as in 11g version.
If you haven’t yet install the environment or started the server, go to my previous post Oracle SOA Suite 12c Installation.
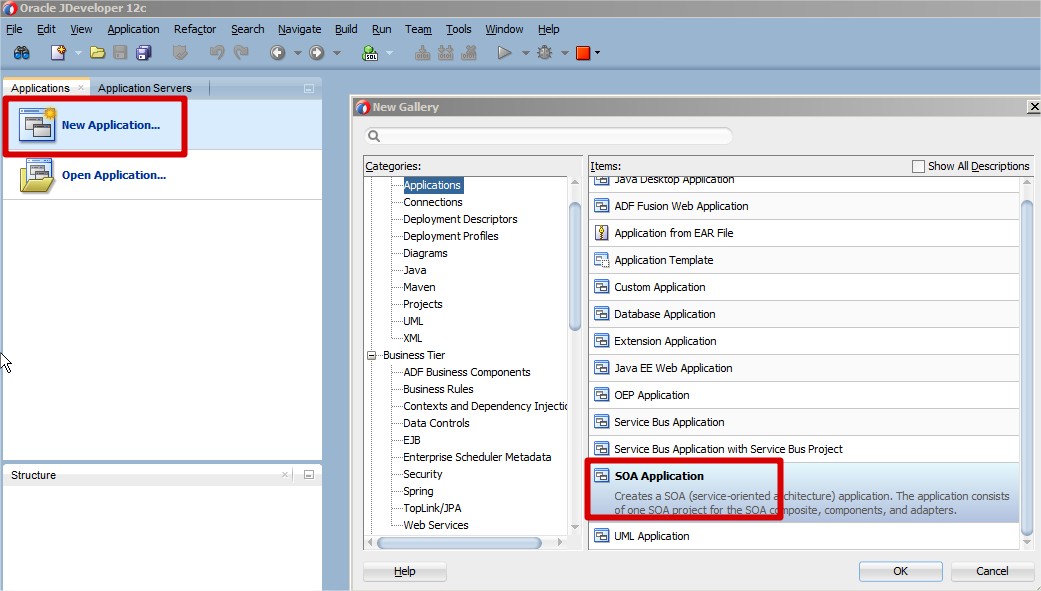
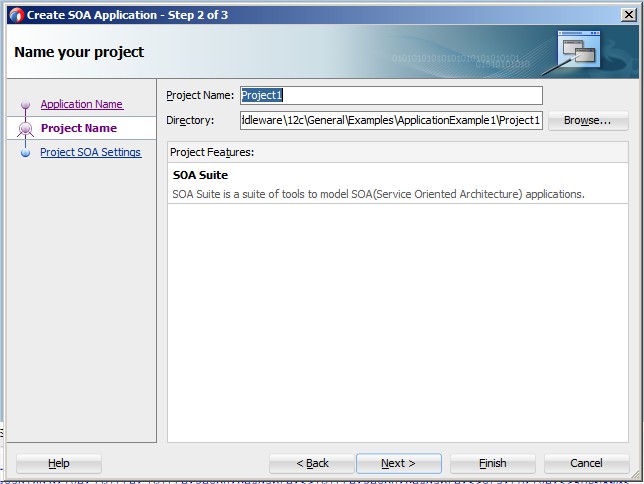
For this post I’ve create a SOA application with new project, and selected a BPEL component:


Continue Reading »
Posted in Bpel, Development, Enterprise Manager, JDeveloper | Tagged bpel, em, oracle soa suite 12c | 1 Comment »
June 6, 2015 by Arik Lalo
With the latest version of SOA/BPM Suite 12c (12.1.3), Oracle provides installations in 2 modes: Development and Production.
In the Development mode, and unlike previous versions, with 12c you can choose to download, install and run a complete environment on your local machine. All with only 1 installation file.
The production mode, on the other hand, includes full sets of components that allows you to set a production environment (or TEST/UAT).
In this post I will describe in few steps, how to download and install Oracle SOA suite 12c in development mode.
Please follow the next step in order to complete you Development environment preparation:
Continue Reading »
Posted in Installation, JDeveloper, SOA Suite | Tagged 12c, Installation, oracle soa suite 12c, SOA Suite, weblogic domain | 1 Comment »
March 17, 2015 by Arik Lalo
To enable integration with the Universal Content Management (UCM), Oracle provides ‘out of the box’ web service called – GenericSoapPort.
With this WS you can execute operations like CHECKIN_NEW, DOC_INFO and more.
Attaching a policy to the WS is mandatory, as you will be obligated to add a SOAP Header user/pass.
In this post I will guide you how to attach the policy, and enable the WS. (I’m taking into consideration that IPM managed server was installed, as well as OWSM)
The steps bellow describes how to attach the required policies:
- From the EN, right click on your UCM managed server, and choose Web Services

- Go to Oracle Infrastructure Web Services tab and click on GenericSoapPort

- Go to OWSM Policies tab, and click on Attach/Detach button
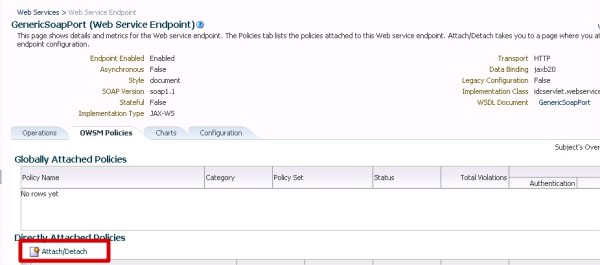
- From the list choose: oracle/no_mtom_policy, oracle/wss_username_token_service_policy, and press ok

That’s it.
Now you can test the WS from the EM:
- Go to Configuration tab and enable Endpoint test:

- Click on Web Service test

- Open the security detailed header, click on OWSM Security Policies, click on the wss policy and enter the user/pass (a user with UCM privileges)

- Enter the payload and run. For example:

Good Luck
Posted in UCM | Tagged oracle, SOA, UCM, Universal Content Management, web services | Leave a Comment »
July 2, 2014 by Arik Lalo
Here is a small example of a way to enable or disable a command button using a standard functionality of an ADF.
Take for example the next scenario: You want to reject a form, and you must enter a reject reason.
For that we will use a commandButton (for the reject action) and an inputText (for the reject reason).
Change both objects’ attributes as follows:
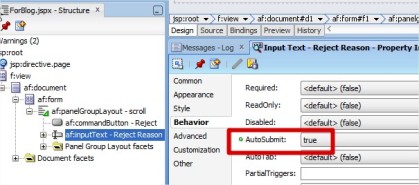
inputText:
- Set the AutoSubmit property to ‘true’:
CommandButton:
- Set the PartialTriggers property to the Reject InputTextId Id:

- Set the Disabled property to have a condition base on the InputText value:
In my example: #{empty bindings.RejectReason.inputValue}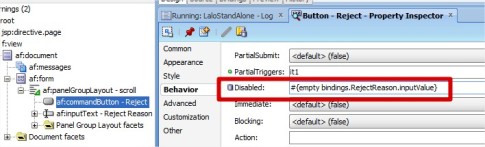
Run the page and test it.
Good Luck!
Posted in ADF, Uncategorized | Tagged adf, Middleware, oracle | Leave a Comment »
Older Posts »